


A lot of tasks in computer vision require images taken in the wild (i.e. road, events, etc.), but building a dataset for human behavior related tasks can be tricky. As you must know, GDPR does not allow storage of pictures taken without consent.
It would be a shame to limit AI applications due to GDPR right? At Picsellia, we are dedicated to help people build better computer vision models, so it only made sense for us to build an anonymizer to help you build GDPR-compliant human-related datasets.
What Does a GDPR-Compliant Image Look Like?
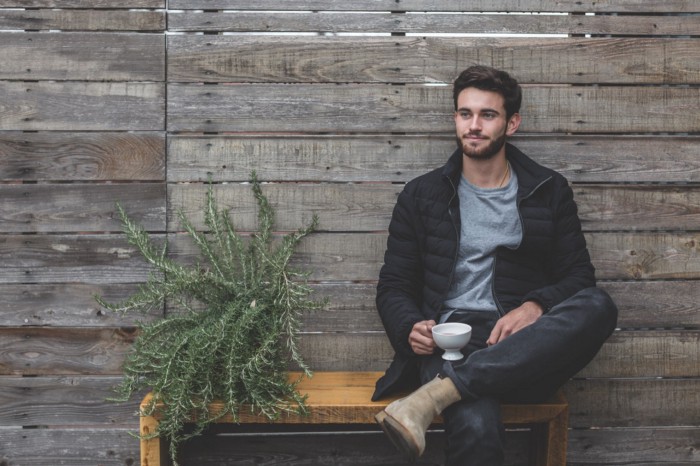
Well, let’s meet Tom (don’t worry, I found Tom on Pexels, so he won’t mind).
As you can see, 100% of his face is visible, which is not quite GDPR compliant.
In fact, to be compliant, +50% of his face should not be visible, preferably the top 50% of his face to hide his eyes.
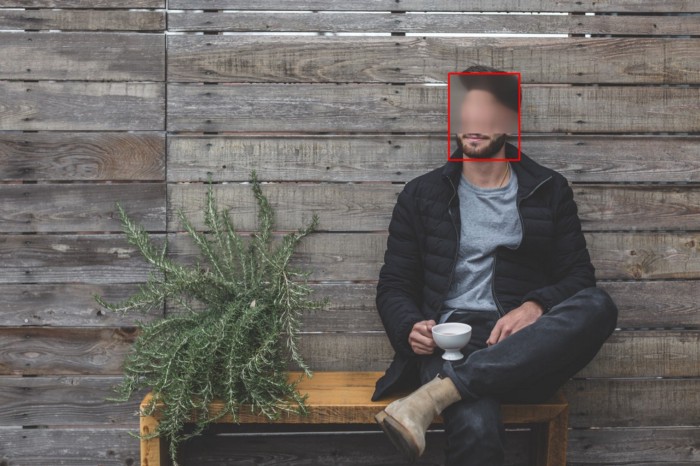
Like this!
How To Build a Robust Face-Detector?
By now, you should have an idea on how we developed our anonymizer :
- Building a face-detector
- Identifying the top 60% of the face
- Blurring it
- Re-writing the picture
Why Build Your Own Face Detector?
I’m sure you saw a bunch of tutorials on how to train a face detector with openCV or something. These algorithms work well for close-shot pictures, but have you tried them in the wild? Well... it’s not quite good. And most importantly, now that’s the world is living with Covid-19, face detector algorithms need to adapt to the new reality of everyone wearing masks.
Speaking of masks, to build our dataset, we used a face mask dataset annotated by humans in the loop at the beginning of the pandemic. It’s composed of 6000+ pictures of people wearing masks or not; you can find it in our Dataset Hub.
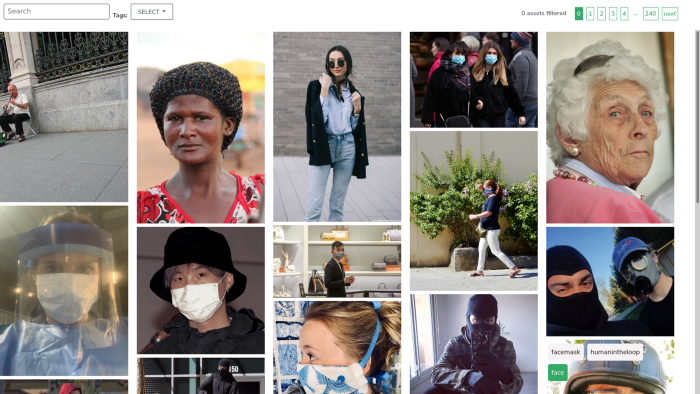
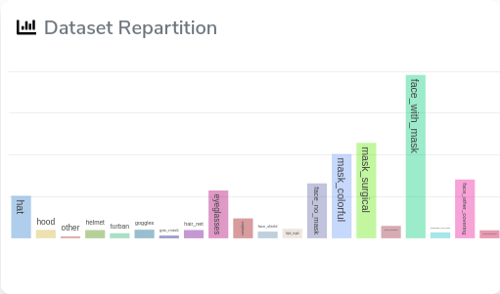
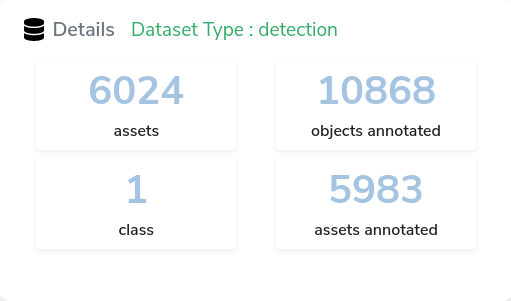
With Picsellia, you can quickly access this dataset and see the labels repartition, here we have a total of 10000+ annotated faces in the wild.
But we don’t want to build an other face mask detector.
We will need to tweak this dataset a bit in order to create a dataset suited for face detection, to do so we can simply create a new version of this dataset and merge all the labels in one -> FACE
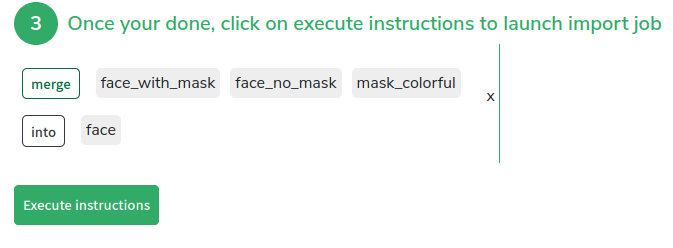
We let the platform work a bit, and voilà, we have a dataset of 10,000 + annotated faces
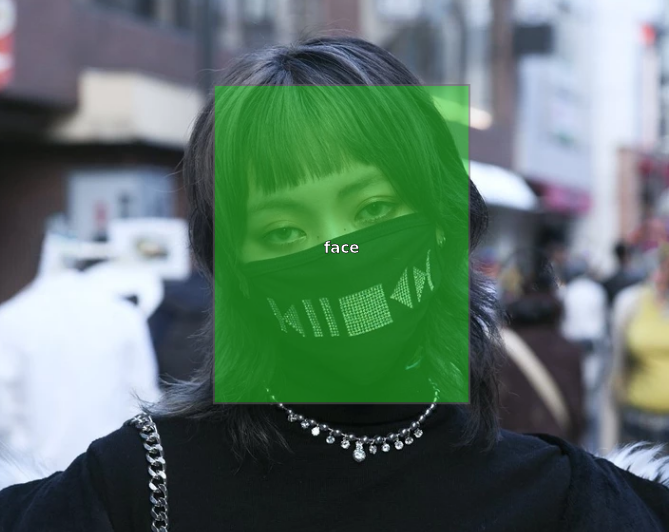
The pictures are really diverse but here is one example:
Now, Let’s Train Our Model
Before training, we must think of what we want to achieve. We wanted a model to perform anonymization at high speed, but also at high confidence score, because we can't afford to manually play with the confidence threshold all the time.
We will also aim for a high precision score, since it'd make no sense to anonymize only one person in the picture.
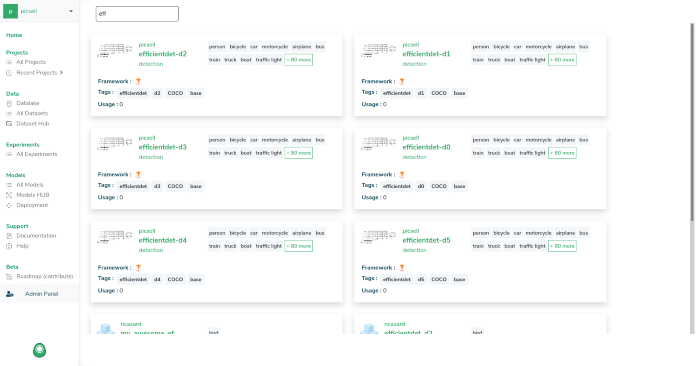
Let’s take a look at Picsellia’s Model hub, where you can find ready to train Tensorflow-based computer vision architectures:
To understand how to launch multiple training with different architectures with Picsellia, I invite you to read our last article.
For this anonymizer, we chose to use an EfficientDet-d2 for its convergence speed and accuracy.
Here are the results logged in Picsellia.

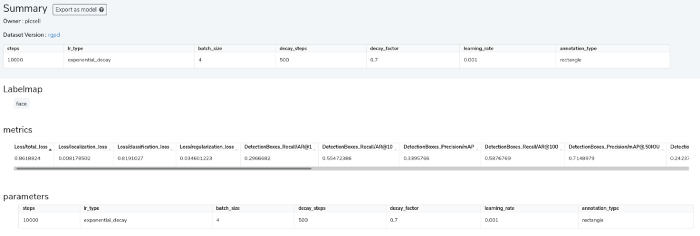
Our training is kind of noisy but we managed to obtain a quite good maP so we’ll use this as base for our anonymizer.
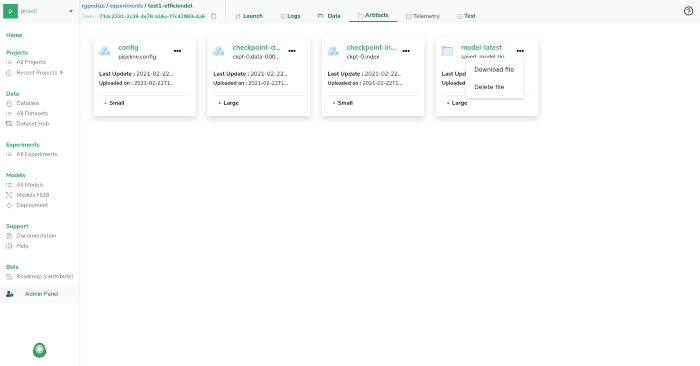
Let’s download our saved model in order to build our anonymizer.
Now that our model is trained and exported, we can download it to use it locally, to do so, you just need to go to the artifact of your experiment and download the saved_model.zip file.
Ok, now that we have a robust face detector, we'll be able to build an anonymizer really quickly.

First, let’s import some packages and disable all the warnings from Tensorflow—who wants to see warnings really?
You should place your saved_model directory at the root of your project (don’t worry, code will be given below).
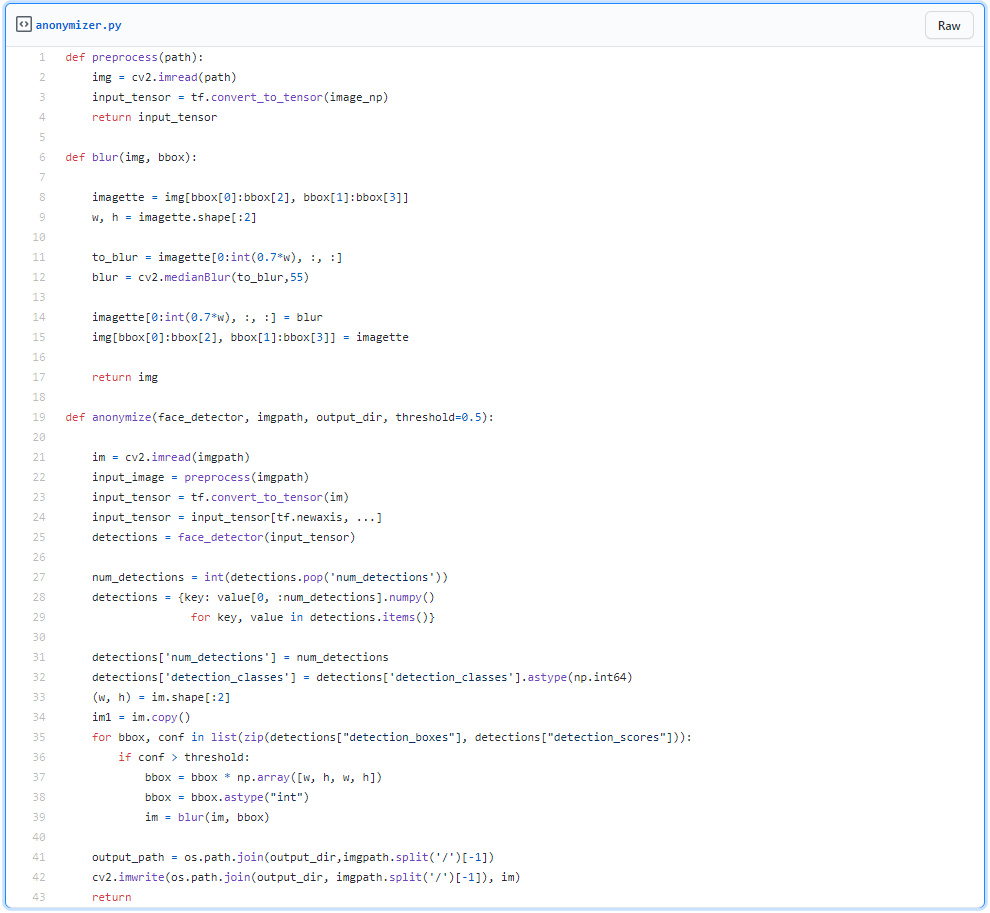
Let’s load the saved_model and declare a pre_process function.
Now you are just few lines away of getting an anonymizer, we only need to extract the bbox with a high confidence score, let’s say 0.5 and above, and blur the top 70% of the detected faces.

And there you go!
You can find the code here.
If you'd like to try out Picsellia yourself, book a quick call and request a trial here!


